


Le Diner à San Diego: An Experience!
… A few months ago I heard about this amazing evening event in San Diego: Le Diner à San Diego. It sounded surreal, to say the least. The location was withheld until hours before it started- and I love a good mystery! Everyone was to wear white, dress elegantly,...
Read More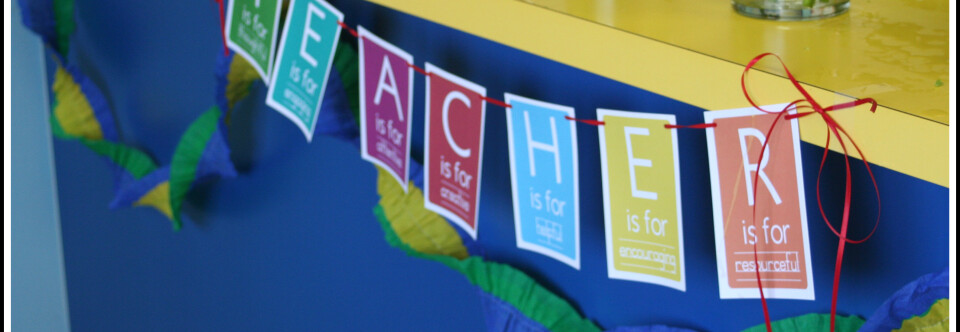
Teacher Appreciation Week
… I love a good Teacher Appreciation Week. When I was a teacher this week couldn’t come at a better time; it was usually during a crazy, hectic spring-is-insane kind of week, and the parents at our school always did an amazing job of making us feel loved and...
Read More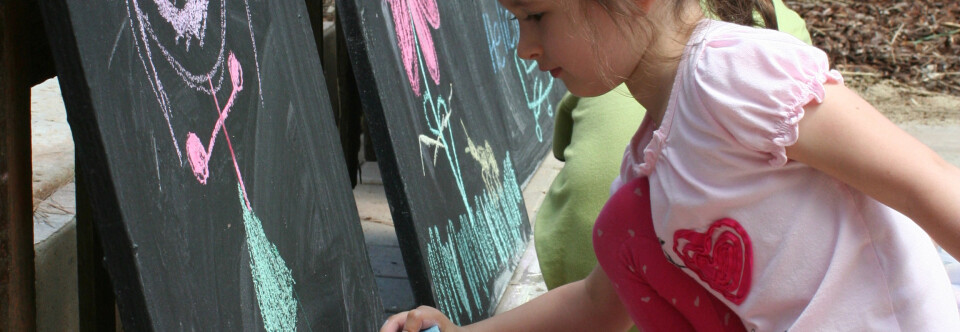
DIY Chalkboards {Summertime Fun!}
….. I want this summer of 2012 to be one my kids remember. I want it to be fun. I also want to be able to say to them, “Go Play Outside!” as often as possible. I have lots of memories of being sent outside to play when I was growing up. There’s...
Read More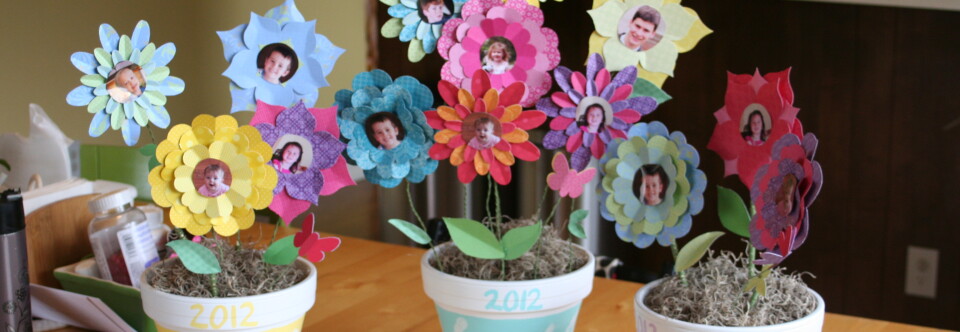
Mother’s Day Project & San Diego MNO!
Are you ready to clean up your Pinterest Boards? Thursday is Clean Up Your Pinterest Boards Day! Join us and make sure your pins are legit! Can’t wait! Are you ready for Mother’s Day? I am! I love having a day to celebrate the fact that I’m a MOM!...
Read More
Jack’s Party: Scavenger Hunt!
I wanted something easy for the kids to do during the party, and since I was hopeful that it wouldn’t rain and we have a pretty big yard, I wanted to keep them outside for at least part of the time. I started by searching on Pinterest for “boy parties” and...
Read More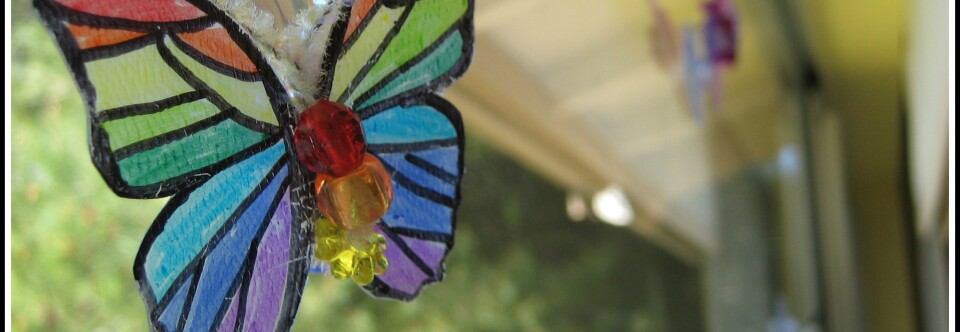
Pinterest Projects: Butterfly Window
Maybe I should call this “Butterfly Week”? {For my fellow Pinterest Pals: Please do NOT pin this post! Please go the the original post, linked below, and pin her original content. I want to blog and pin with integrity, and I am not the original person who thought...
Read More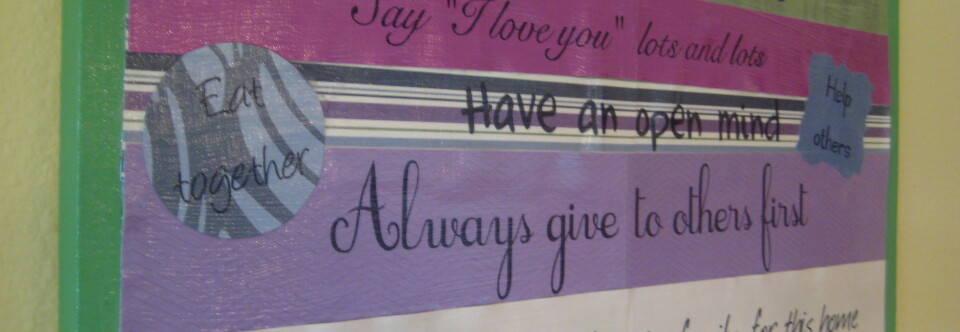
Jane’s Family Rules
Yesterday I introduced you to my wonderful friend, Jane. Jane’s birthday is in May. It is now January. Why does that matter? Well, it was in May that I told Jane that I’d make her a set of family rules for her home. And just this past weekend I finally...
Read More
Something needed to be done. Before I get into this let me preface everything by saying that eventually we are going to do a complete overhaul on our house. We are actually meeting with a contractor this week to talk about what we could do and how many thousands of buckaroos we would need in order to do what we’d like. Michael and I like to brace ourselves early. It won’t happen for quite some time, but we need to dream a little and take in the big picture.
Anyhoo, our front entry way has what some would call a security gate. It also functions as a screen door, so while my first reaction was to rip it off the house, I realized that then we couldn’t leave the door open for a nice breeze, which you can do nearly 365 days/year where we live. I like to keep tabs on my kids and my dog, so there’s another nice function of the security gate. Also, lizards like to invade our house from time to time (I can’t tell if it’s different lizards or the same lizard that is stalking us, be he/they are not nice and he/they bite if given the chance. Neat, eh?), and when we first moved in we heard coyotes howling in the night, too, so there are LOTS of good reasons to not get rid of this thing until we have a nice replacement.
Here’s the “before” shot. Brace yourself!

Black is not exactly a welcoming color. It may say, “I’m a security gate.” But it also has sort of a “go the he** away” vibe to it, too. I’ve been itching to paint it since we moved in, but other things took priority. With the school year looming and other things on our horizons, I decided it was time to do it. So, this last weekend I taped everything off, primed it up…..

And Voila!

(don’t worry, Sophie isn’t dead- she’s just old.)
It looks much, much better. I’m not entirely sold on the color- maybe should have done a darker brown to match the door, but at least it’s not black anymore. If you are blessed with a security gate circa the 1970s and need to spruce it up, you will need at least 5 cans of spray paint, lots of drop cloths (light ones- heavy ones won’t stay up), painter’s tape, and depending the color you may need some spray paint primer, too. I actually need to get one more can and touch up some areas, but we’ll see how important that becomes once school starts… 🙂
Did you notice anything else about the entryway?

If you haven’t seen, you can enter my first giveaway to win a sign similar to this one for fall. I plan on making one of these for each season, and a few holidays. Click here to enter. Hoooray! I’m very happy with how this helps our entryway- it’s so nice to have some color and fall colors, even though it’s not really fall yet.
The only thing left for this area (for now) is to fix that lovely overhead light. We have one to put up- I’ll post a picture once it’s done, but that’s Michael’s territory- I’m not allowed near the electric work for good reason. We’d also like to tile up the cement, but that will depend on our eventual plans for the house- we’re not going to tile it now if we may rip it up in just a few years.
p.s. Check out this guy- he was hanging out in our small woodpile in the corner. I’m glad I saw him before I moved the wood- he was HUGE!
 Do you have an entryway? What would you like to do to it?
Some of my friends who read this blog regularly (I love them for that) may be wondering how this little huge blog challenge I’m doing is going. If you have no idea what I’m talking about, click that little button on the right (under the subscribe button) and you’ll find out what I’m talking about.
Well…technically today is day 29 and I’m working on Day 25. I’m behind. But I’m not quitting- just catching up. Whew! It’s been a challenge in many ways, but mostly just keeping tabs on everything in addition to daily life has been the biggest one. I did decide to switch my domain over, revamp the theme a bit, and do some other background stuff that no one will ever see that took a ton of time. But I’m proud of doing this challenge- it pushed me just like my trainer pushed me in my pre-marriage & mommy days.
Day 25 Day’s task is to ask a question, and my question is a simple one: how do you stay true to yourself and who you are? I’ve seen lots of blog moms post about this lately. Blogging can give readers a sense that people are more than they are. Take Design Mom, an extremely successful woman with 6, count ’em, 6 kids (who are gorgeous). I was reading her blog, clicking page after page, oohing and aaahhhing, and thinking, “Oh my LORD this woman is Super Woman!” Then I started getting down on my own situation- my house isn’t perfect enough, my wardrobe isn’t cool enough, I’m not wearing enough makeup and I certainly haven’t gotten far enough with my crafting yet. Then I clicked Design Mom’s FAQ page and found this little tidbit, which really resonated with me:
“…And the answer is: I don’t. Not even close. In fact, on some level, I believe the whole idea is a myth. If my blog is really good on a given week, then you can bet my house is a wreck. If my blog seems a little bleh, then it’s guaranteed we’ve got a lot going on at home. If you know me in real life, then you know I work in my pjs as often as possible and that I’m a very typical mom. As each new child joins our family, I have to learn to be a more flexible and lower my expectations another notch.
…One more thing. Please keep in mind that on this blog I attempt to keep things very positive and showcase the best and prettiest things happening in my life. That doesn’t mean there aren’t bad days and failed projects and lost tempers. At the end of the day, blogs are a show. I suppose that’s why we like them so much.”
It made me feel so much better. And it got me to thinking that blogging, while amazing, is misleading. We see all of these wonderful things, but as Gabrielle points out, people rarely blog about the real stuff. Blogging is, for me, one way to see the good things in my life, and to make good things in my life. It would be easy, though, to get lost in comparison and start feeling like you don’t measure up.
So, how do you stay true to yourself? Do you limit your blog-self to a certain amount of blogging per day? Do you ride the different waves of life and take it as it comes or plan it out to keep it sane?
For me, I try to remember that while I truly love this new blog (and have completely neglected my family blog and family photos this summer), I have to take a breather or it gets the best of me. I’ve asked my husband to keep me in check. School is starting soon, and then my time to craft/sew/create will be even more limited by the fact that I have to bring home a paycheck for another 9 months. I do worry about balancing all of this, but it will all work out in the end- it always does. I have to focus on life day-by-day, and not get wrapped up in the politics of teaching or who I need to please. Other than planning doctor appointments and social dates, I have no long term goals mapped out on a calendar. Maybe that needs to change, but right now I’m doing good just keeping up. I need to please myself, my kids and my husband, and everything else is small potatoes.
I bought a ring recently- I can’t wait to get it in the mail. It says, “Be true to your dreams.” That is going to be my mantra this year as I set out to start a creative life and finish my teaching life, if only for a while.
I’d love to hear how you stay true to who you are in your day-to-day life. Any tricks? Words of wisdom? Little vignettes to share? Post ’em here- I’d love to do a recap!
p.s. Did you enter for my first giveaway? No? Click here– you have until Friday the 20th! I’ll announce the winner on Saturday!
Read MoreProduct Review: Ironing Pad
I hate ironing. No really. I hate it. I know of some people who love certain household tasks (my mom and my brother-in-law love to vacuum). I have yet to find one that I look forward to. That being said, I love a product that makes any household task easier or better or faster. This one that I have found does all of these things. I love it.
We are blessed with a laundry room in our house, which is great. Not having laundry in the garage seems to be an anomaly here in SoCal, so I was really pleased to know I would have a designated space for laundry and a place to keep chemicals and other things up high. However, our laundry room is pretty narrow, and an standard, run-of-the-mill ironing board would not work. I didn’t want to use our guest room or another room for ironing because I’d never take it down, so we’d always have piles of fabric and clothes needing to be ironed, and one more thing to do. Up to this point I’ve been either a) avoiding ironing all together or b) using our old, over-the-door ironing board. It’s loud- when I take it down it’s creaky, and when I iron it’s creaky. The board itself is too small, too.
I wasn’t exactly in search of anything, but then I was looking through Improvements catalog and found this. (Improvements is one of those catalogs that you never know what you’ll find when it shows up. Lots of great things for your house, and then as you’re flipping through it they spring things on you like the “health and intimacy” pages- oh my.)
I love this thing. It’s the answer to my ironing prayers.
Here’s my dryer before:

And here it as after- this was a great “forced organization” for me- I reassigned some things in about 10 minutes to make way for the pad (okay, and I also finally put away the carpet adhesive). Now the dryer is always clear. Love it!

What I love it for best is pressing/ironing fabric that is ready to be sewn into something. I throw all the fabric behind the dryer and pull it forward as I’m ironing, like this:
 (Sorry about these photos- they were taken at night.)
It’s great. I have to shift it to the left or right as I go, but I still get ironing done so much faster, and having nothing to pull out or set up makes it so great. I wouldn’t say I love ironing now, but I’m enjoying it much more than I used to because of this thing.
So far it’s held up great. The only place I’ve noticed with any wear and tear is when I ironed some very small parts of sewing projects to press them, the area around it did show some heat damage. Also, when it comes it reeks of plastic, so if you’re sensitive to smell you may want to open it outside and let it air out before bringing it inside. Last possible negative is that it covers the lint filter on my dryer, so I have to remember to clean it. If you have a fancy dryer like the one I dream of I’m not sure where the filter is, so it might not be an issue for you.
I think for $13 you can’t beat this thing. I’m wondering if one could make one on their own with more fun prints or something. Maybe I’ll add that to my list…
Happy Weekend!
Read More
I’m working on this whole “having your house rise up to meet you.” Yeah, I know. I’m a Martha fan and an Oprah fan. Big time. So sue me.
I’m also in the process of revamping our front door… area. Stoop? Threshold? Doorstep? You know- where people arrive. More to come about that, but this whole revamp got me to thinking that aside from all the plants we have, there isn’t really anything to welcome people to our house. I’ve seen little welcome signs around in stores, but none of them have the flair or look that I want. I want them to be just the right size, not too big, not too small. I don’t want them to be boring, but I don’t want them to be too busy because no one wants to be distracted while walking into someone’s house (especially me- I’m accident prone).
So I set to work. Have you seen JSIM? If not, get your booty over there- Cathe gives you free stuff all. the. time. I recently downloaded some alphabets from Cathe here and chose one to use for my sign (Cathe- you rock!). I don’t own a Cricut or a Silhouette (someday?), so it was either print something on the printer or make it myself. I was feeling artsy and techy, so I opened up Photoshop and put together “Welcome” from my favorite alphabet that Cathe gave me, and printed it out on a plain piece of 12×12 piece of paper to create a sort of mock stencil. This did not look “pretty” when it printed- since it was a stencil it was just a functional thing. You’ll see it below in the pictures.
Here are the other supplies you need (see list below the collage):

- Canvas or other crafty surface to put everything on (picture frame? bottom of a box? endless possibilities)
- pencil & permanent marker; also a good eraser if you are sloppy like me
- paint brush with a thin tip
- Brushes and applicators for your Mod Podge and paint
- Mod Podge (if your sign will go outside you’ll want some Outdoor MP)
- Acrylic Paint in color(s) of your choosing
- Paper flowers (mine are by Bazzill Basics)
- buttons for flower centers (doesn’t matter what color they are- they will get covered up)
- coordinating scrap/craft paper (take the easy route- I chose two that were already paired together)
- any other scrappy/crafty things you’d like to use.
- paper plates for Mod Podging
- newspaper for covering your work surface
- scissors- I used two kinds (see photos) a basic pair and a small, extra-sharp pair for the detail work in the frame I cut out
- Clear Acrylic Spray- something to coat the finished product
Steps:
Paint the canvas a color you like. Paint most of it, but you don’t have to paint the very center. (I had orange and brown left over from this and this, so I mixed them up to get a nice fall orange going.) Set aside to dry.

Mod Podge the top of your flowers, being careful not to MP them to whatever they are sitting on. I really just did this to stiffen them up a bit in case the humidity gets to them over time.

Cut your background paper to the size you want. Since my canvas was 11×14, I trimmed mine to about 10×12 (I think).
Choose a shape for your Welcome paper. I was going to do an oval, but then while in Photoshop saw this oval frame and liked it better. I printed the frame on my Welcome paper and cut it out. The frame wasn’t as dark as I wanted because of the pattern on the paper, so I went over it again with a dark brown marker. You could also just trace a shape you like, or draw one freehand, but I’m not that symmetrical in my drawing.

I turned the Welcome that I printed out from JSIM into a sort of pseudo-stencil. I trimmed it up and traced parts of it on the paper, and then connected the dots.
 Then I went over it in an archival pen, and then I painted it with paint so that it would look more handmade/crafty. Here you can see I’m halfway done with the paint.

Get out your Mod Podge! I used two types here- basic Matte MP for the first stuff, and then Outdoor MP for the last layer. I did the two papers, background and Welcome, just on the back first, and then let them dry for about 30 minutes or so. Before they set I went over them with a ruler to make sure there were no bubbles. Then I came back and did the top of the paper.
Flowers: I placed the flowers on with MP. Then I covered buttons with the same papers and MP’d them to the flowers. This was all very messy, which is fun or awful depending on your level of mess tolerance. Since my children were not present, I loved it. Had they been present, I probably would have received 5 phone calls and had to settle 3 tantrums. Instead, I ModPodged in silent bliss. It was great.
After all of that dried, I did the layer of Outdoor Mod Podge. Note: Outdoor Mod Podge is THICK stuff. Work carefully and slowly. Spread out what you have before glopping on more- especially with the flowers.
After all of that dried, I sprayed the whole thing with some clear acrylic spray (outside) and let it dry overnight. Add a couple of hangers and some lovely brown ribbon and voila! A welcome sign!
 Here is what it looks like hanging on the wall. I don’t think the ribbon will stay this long, but I just wanted to see it hanging to give you an idea of what it looks like because…

Giveaway Alert!
Here comes my surprise….

I made TWO! One for me and one for one of you lovely readers. My plan is to make one of these for each season and a few holidays (so yes, there will be more giveaways here at Crafting Crazy). It was really fun to make, and if I can brighten my doorstep and yours, who can lose, really?
How can you win this Welcome Sign? Read on:
This Giveaway includes:
1) Polka-Dot Welcome sign pictured above
2) Two brass hangers for hanging (I will place them if you like, or send them along with the sign in case you aren’t sure how you want to hang it)
3) Lovely brown ribbon for hanging- you can let me know how long you’d like, or just let me guess how much you need.
How to win? Share the love. Lots of ways to win:
#1: Leave a comment. That’s all. Just leave me a comment- say hello, I like your sign, I hope I win, anything. Just leave a comment.
#2: Look at the bottom of this post. See the little bar down there that says “Sharing is Caring?” Share my post somewhere from that bar, then come back here and tell me which one you used and if it was cool, annoying, easy, hard, etc. This is a new tool and I don’t want to use it if it’s frustrating. If something doesn’t work, tell me! I need help with this one, so even if it doesn’t work, just tell me and that counts as an entry.
#3: Do you tweet? Follow me on Twitter (button is up on the right) and let me know via a comment. If you already follow me (thanks!) then just let me know in a comment.
#4: Subscribe to my blog via email. In the right side bar near the top you’ll see a box that says “Subscribe to Crafting Crazy Via Email Updates”. Enter your email, and leave another comment to let me know.
#5: Use my RSS feed button (the little orange thing at the top right) or the Google button (below the orange thing) to add me to your blog feeds somehow. Let me know- leave another comment.
I will announce the winner on Friday, August 20th and will send the winner the sign to hang. I would love it, if you win the sign, to send me a picture of it hanging in/on your house so I can see where it ends up. If you blog, I’d love a mention on your blog, too!
Can’t wait to see who wins!
I realize that sewing machine maintenance is not the most amazing thing to post about, but it might help someone out, so I thought I’d post just in case.
I was having some problems with my sewing machine. It kept jamming the thread when I was sewing simple things, and it was getting quite frustrating. I emailed my friend Kari at Handmade Mommy to see if she had any thoughts on why it would be jamming up. I call Kari when I really need help- I feel so lucky to have a friend who is not only smarter than me about sewing but also generous in sharing her knowledge. Kari suggested I try a new needle, but I already had a new needle, so at least I knew that couldn’t be it. Then I had a revolutionary thought: consult the manual.
I pulled it out and looked in the back. I love manuals that are written by people who don’t speak English. They crack me up. Thankfully this part of my manual is very well done (most of it is, really). It said to clean things up a bit, so I flipped to the section that told me how to take off the needle plate and opened up my machine. I laughed heartily when I took it off because this is what I saw (sorry for the big photos, but I thought it would be nice to see how bad it was in there!):

Then, when I removed the bobbin case, THIS is what I saw:

No wonder I was having problems! And do you recognize that color? Gee, I wonder if all of that copper-colored lint might have come from this project. I used a small, soft paint brush (with no paint, of course) to get all of the lint out. Now it runs like a champ. Here’s the cleaned up “after” photo:
 Much better! I imagine one is supposed to do this often, so I will be checking underneath my machine’s “hood” a little bit more frequently. Hope this is helpful to all my fellow sewers!
Eek! Update: I emailed Chris at Pick Up Some Creativity and shared my post with her. She then so nicely posted this on her blog- I’m in a list with some pretty amazing bloggers! Thanks, Chris!
Read More
(Side note: this is part of my 31DBB Challenge- we’re supposed to write an opinion post. I’m way behind, but better late than never…{I want to win a free camera} So here’s my opinion. If you’re new, yes, this is a crafty blog, but I have something to say that has nothing to do with crafting- hope you like it!)
I have lots of friends in my “real world” (as opposed to my blog world) asking me about blogging in the last few weeks. It’s interesting to see the reaction people have to why a person blogs. As someone who became an avid blogger (via my family blog) and general internet nerd during my year leave of absence from teaching (ah, that was such a nice year), I can see how people who work full-time, or even part time, sometimes look at blogging as, well, rather strange. When you take a step back and look at what blogging is, it’s overwhelming. If I take too much time to think about hundreds of people hopefully/possibly reading about me, what I do, or what I think, it’s kind of crazy.
There seem to be lots of opinions out there, and most of them are strong. Here are some of the vibes I get from various people I have spoken to about blogging, and also my response to those opinions. No one has ever outright said these things to me- they are just vibes I pick up on from time to time.
“It’s dumb.” (or any other negative adjective you’d like to insert- stupid, useless, waste of time, etc.)
What I think: It’s not dumb. Perhaps if you find a blog you don’t relate to it might seem dumb or irrelevant, but it’s only irrelevant to you- it might be someone else’s inspiration.
************
“You can’t really make a living blogging.”
What I think: Heh. Oh really? Oh reeeeallllly? Then why does Darren exist? Why does Dooce exist? You can make a living blogging. But it’s something you have to work your arse off doing. Is it a living you’d choose? Most likely not since you don’t think it’s possible. But hey- to each his/her own, I say. I’ve spent a lot of time on my blog this summer and hardly anyone is looking at it….yet. I hope that will change, but even if it doesn’t it will make me happy to leave a mark in this huge cyber-world. If it makes me happy, what do I have to lose?
************
“You have too much time on your hands.”
What I think: Nope. I definitely don’t have too much time on my hands. I have two children, I hope to have a third in the near future, I’m going to be teaching in a few weeks, I’d like to workout on a regular basis, I have a house to organize and keep clean, and I also have this little thing called a relationship with my husband. I’ve got plenty to do. But I like blogging. So sue me.
************
“You’re addicted to the internet and social media.”
What I think: Hell, yeah, I’m addicted to the internet and social media! I love it! If you don’t, more power to ya. I still get out of the house, I have a social life, I have friends (hi, friends!) and I think I’m doing okay balancing my life as best I can. But I love Facebook for the way it allows me to keep up with old friends and new, I love Twitter even though I have yet to fully grasp it, and I love blogging because without it I would never have found inspiration to start sewing and keep making stuff I like.
I’ve often seen comments on friend’s Facebook status that make fun of people who take the status update to an extreme. Sometimes, being the rather sensitive person I am, I’ve wondered if they are commenting about me (then I remember that I rarely post about going to the bathroom or what I just ate- unless I’m out to dinner and having something ridiculously delicious- then I share). But at the finish of this post I shall worry no longer. I’m going to own my blogging and social media loving self and live. it. up. I think it will be advantageous when my kids are older- when they are talking about the latest and greatest things on the internet I may actually know what they are talking about. And I will meet so many people on this journey of mine that I can’t possibly sit around and wonder if everyone approves or disapproves. It’s official: I don’t care.
What is blogging to me? It’s a way to record my journey and to share it with other people. It’s a way to reach out across the country and the world to say, “Hey! Check this out!” I have so many friends who blog not for the recognition but to just write, get their thoughts out, and have a place to reflect on their life. Blogging is the new form of a diary for so many people. It will track my children’s lives, it will track my learning process, it will keep me sane in many ways. I have so many things I think about- blogging is where I process and manipulate my brain.
So, what interesting comments have you received about the blogging world? Do you care what your friends/family/colleagues thing about your blog? Your interest in social media? I’d love to hear from you!
Read MoreShhhh… I’m trying to concentrate.
Well, the time has come. I have gotten as far as I can on my own, so the next couple of days are going to be spent two places.
Here, because I need to get crackin’ on some projects:

And here, because I need to get some schooling on the innards of my blog:
 I love WordPress. But I do not know WordPress well enough. We shall see if this book can change that. Time will tell. Wish me luck!
About Natalie
 Life is crazy. Craft it well. Thanks for stopping by Crafting Crazy! I'm stumbling into a new sort of life after leaving a 12-year teaching career. More of a practical crafter, I'm trying to temper the perfection a bit. If I mess up, I’ll be sure to share- then we can laugh together. Here you'll find anything I like that makes my life better or fun. Crafts, of course, but also posts about food, home decor, exercise... whatever I'm dabbling in at the moment. I'm so glad you're here- thanks for stopping by!
 Content Brewing!
Ready to Rock?

I’m a Clever Girl!
SITS-stahs!

Chronically Distracted


This work is licensed under a Creative Commons Attribution-NonCommercial-ShareAlike 3.0 United States License.
Keep Up With the Crazy