


Le Diner à San Diego: An Experience!
… A few months ago I heard about this amazing evening event in San Diego: Le Diner à San Diego. It sounded surreal, to say the least. The location was withheld until hours before it started- and I love a good mystery! Everyone was to wear white, dress elegantly,...
Read More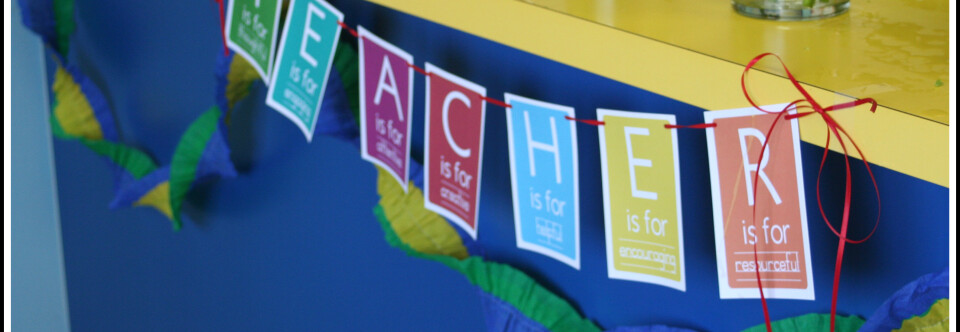
Teacher Appreciation Week
… I love a good Teacher Appreciation Week. When I was a teacher this week couldn’t come at a better time; it was usually during a crazy, hectic spring-is-insane kind of week, and the parents at our school always did an amazing job of making us feel loved and...
Read More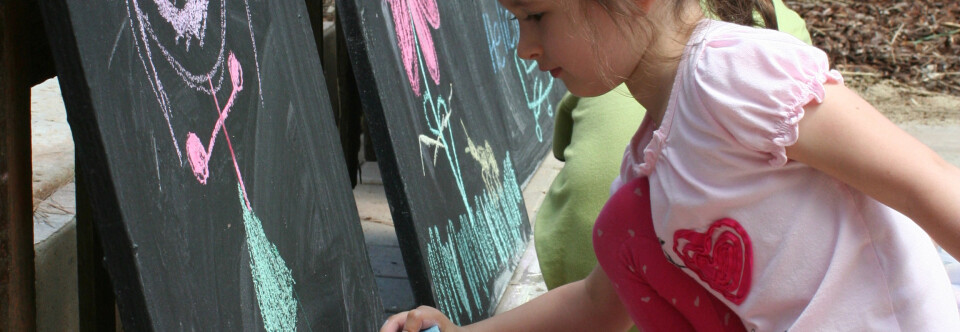
DIY Chalkboards {Summertime Fun!}
….. I want this summer of 2012 to be one my kids remember. I want it to be fun. I also want to be able to say to them, “Go Play Outside!” as often as possible. I have lots of memories of being sent outside to play when I was growing up. There’s...
Read More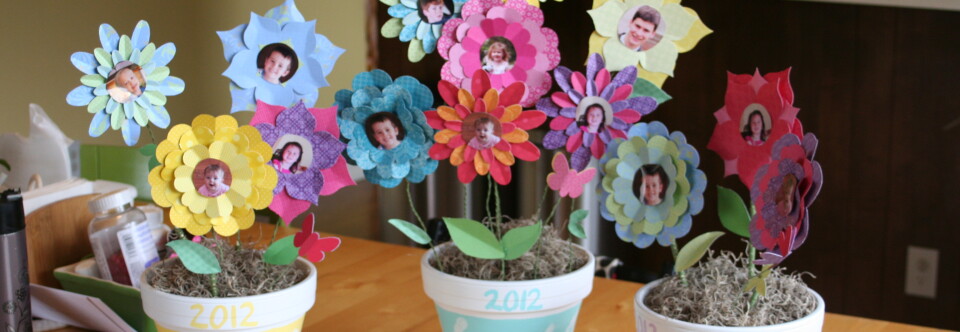
Mother’s Day Project & San Diego MNO!
Are you ready to clean up your Pinterest Boards? Thursday is Clean Up Your Pinterest Boards Day! Join us and make sure your pins are legit! Can’t wait! Are you ready for Mother’s Day? I am! I love having a day to celebrate the fact that I’m a MOM!...
Read More
Jack’s Party: Scavenger Hunt!
I wanted something easy for the kids to do during the party, and since I was hopeful that it wouldn’t rain and we have a pretty big yard, I wanted to keep them outside for at least part of the time. I started by searching on Pinterest for “boy parties” and...
Read More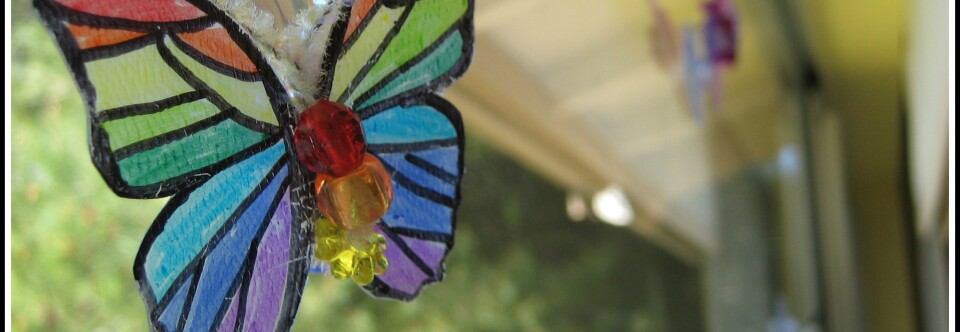
Pinterest Projects: Butterfly Window
Maybe I should call this “Butterfly Week”? {For my fellow Pinterest Pals: Please do NOT pin this post! Please go the the original post, linked below, and pin her original content. I want to blog and pin with integrity, and I am not the original person who thought...
Read More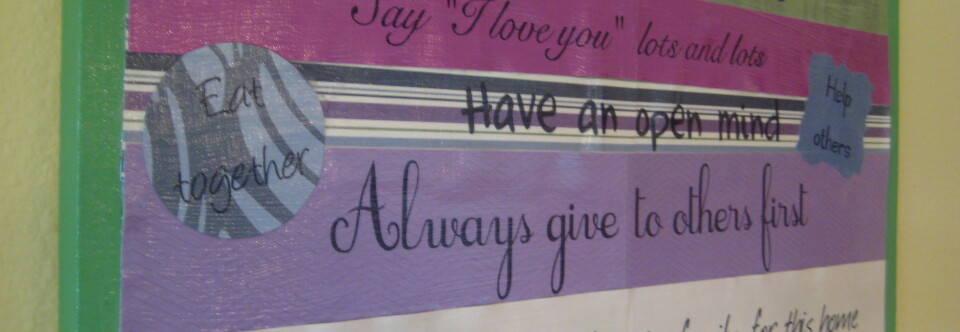
Jane’s Family Rules
Yesterday I introduced you to my wonderful friend, Jane. Jane’s birthday is in May. It is now January. Why does that matter? Well, it was in May that I told Jane that I’d make her a set of family rules for her home. And just this past weekend I finally...
Read More
Whew! I’m back! I’m sure there are still several things to tweak on this new (and hopefully improved) site, but I need to get posting, wouldn’t you say?
I completed this project months ago and am so happy to a) have made it, and b) never have to make it again. Ever.
You may have seen in my post about our house that we have an office. It looks much different than it used to because now it’s a guest room AND my craft room AND an office. While I didn’t need the office desk anymore, I did need help with all of those sewing notions that pile up. I hate digging for stuff. Maybe it goes back to my lovely run-in with scabies in Italy (shall I post about that sometime? You tell me….), or perhaps it’s just that when I have to dig for something it’s a reminder that I should be more organized in whatever area it is I’m digging in. This project eliminated a lot of that. I am also a huge fan of taking advantage of vertical space. Hence:

These sit above my sewing table, and they hold not only the things I use most when sewing, but also some crafting tools, as well. And of course, it’s all because of Martha….
 If you consult your Martha Stewart’s Encyclopedia of Sewing and Fabric Crafts, you’ll find this one on page 267. I apologize in advance for not taking great pictures- this was definitely in my “blog break” time and I was really doing this for myself.
I’ll walk you through what I did and what I used- I used the instructions in the book as a guide, but really had to wing some of it. As a result some of my pockets didn’t turn out super swell, but that’s okay- they work. You’ll see in photos below I actually made three of them, and the middle one has office supply things in it, which is nice.
In the book they suggest using homasote fiberboard. When I went looking for homasote fiberboard I could not find it in a small enough size. The one size I saw at Home Depot was big enough to warrant bungee cords on top of my car, and that felt a liiiiiittle over the top, so I opted for some plain pieces of wood. The two squares are 24×24, and the middle one is 12×24. I then used some quilt batting and spray adhesive to give them a softer look. I wrapped them up with the fabric and taped them in the back temporarily while I figured out what was going to go where. Then I pulled everything that was driving me crazy and laid them out like you see here just above. This took a long time. I really wanted to get it right, so I debated for probably-excessive amounts of time making sure I could fit everything I wanted. I really took the photos of the layouts so that I could refer back to them while I was in the process- if you decide to make one or more of these I highly recommend it!
The most time-consuming part, however, was cutting the fabric for the actual pockets. The book gives you a formula for adding length and/or height depending on the pocket you want to make, so I followed that and for the most part it worked out just fine. What was challenging was keeping them all straight so that I didn’t a) get them mixed up and b) remembered where they were supposed to go. You also have to press them and sew the tops over so that they look nice (who’d-a-thunk- Martha wants something to look…nice?). 
Here is a collage of some of the process. You can see that I ended up using some office labels to keep everything organized. This worked nicely because they stuck nicely to the fabric without ruining it, so once I had the pocket in place and ready to go, I could toss the label and it was like checking off an item on a to-do list. Done!
The bottom left photos shows the middle panel I made for office supplies- and you can kind of see that I taped a border around the edge. I did this to help myself remember where the edge of the wood would end up being- sort of helped me keep everything level, I guess. And the bottom right is just a sketch of each board so I could write down measurements, placement, etc.
Once I had the pockets sewn on I stapled them to the wood on the back with a staple gun about 8 million times. My husband helped me place the hanging wires on the back and, since we used wood which is much heavier than the fiberboard, we made sure to hang them on studs in the wall so that they wouldn’t fall off eventually (crossed fingers). Here are a few more pictures of the final product as it looks in my office:

It’s hard to tell in these photos but my office is still a dusty lavender- quite similar, actually, to my new background color on this blog. I love it. And the gray of the fabric and the print really looks nice. You can also see that I made some little cups to hang- it looked sort of empty in between and I had a ton of fabric left over, so I made six little hanging….cups(?) to put things like buttons, pins and safety pins in.
How do you organize your sewing notions? If you decide to make something like this, give yourself plenty of time and don’t rush. I didn’t rush this one and I still made a few mistakes, but I still love the final product. My pockets don’t look nearly as perfect as the stuff in Martha’s book, but it’s so very nice to have this stuff right in front of me whenever I need it. If you have a question, if I left something out, please leave a comment! I’m going to link up to some link parties, too, as soon as I get a chance! And if you’re all the way down here at the bottom, thanks for reading this far!
I linked up to:
Read More
Under Construction!
I am making some major changes to the blog this week. I’m hoping a week is all it will take to get things back to 100% awesomeness. We shall see! Thanks for you patience!
Read MoreI’m baaaack…..
Hi everyone… or should I say…. Is there anyone out there? I’m back!
I am working on some major changes on the blog, so if you’re visiting and things look Crazy with a capital “C” please bear with me. But don’t bare with me- that would be inappropriate. 🙂
I’m changing things up and taking a huge leap off the WordPress cliff of themes, code, and a whole slew of stuff I don’t understand, so things could get interesting. I backed everything up and am going to start messing things up soon- I hope I’m at least mildly entertaining as I get things going where I want. I have lots of posts planned, lots going on, and lots to talk about once I am ready, but first I want to make things pretty.
More soon!
Love,
Nat
Read MoreHello 2011, Goodbye 2010
Hi everyone,
I’m not even sure who “everyone” is these days- I know I don’t have a huge following on this here blog (yet). I’ve been thinking the last few days about this blog and what I want it to be. I have yet to totally arrive at any conclusion to that, too. I do know that, with as much change as I’m going to see in the coming months, I need to take it easy on myself. The readers will come, the crafting will get done- eventually. And perhaps someday I will have thousands of followers and I can refer back to this post and laugh.
What I do know is that right now I must go easy on myself. Work 4 days/week, expecting #3, and trying to keep my head above water: that’s all I need to focus on. I’m still sewing every once in a while, I’m still using good ol’ Mod Podge where I see fit, but my hopes of being a renegade, craft-at-all-hours, multiple-posting blogger WHILE doing all of the things I must to keep myself and my family healthy and sane- those were futile hopes, I fear.
So I guess in a way I’m sort of giving myself public permission to “let my blog go” for now. I will post infrequently, as I see fit, and I will not feel bad about it. I will keep my blog floating with minimal supplies, and come summer time when all of my big changes happen, then “Howdy, folks!” I will be back and blogging (I hope).
Until then I hope to bring you fun posts as they come- maybe once a week, maybe once a month… maybe longer. I thank you in advance if you stick with me through this tough time- because it’s tough for me to work 4 days/week and try to maintain any presence…anywhere, let alone online. 🙂
Hugs,
Nat
Read More
Hi friends,
Working has certainly taken its toll on my little blog here. I hope after the holidays I can really come up with a system to keep posting more regularly. We’ll see…
Onto my project… I actually did this just before Halloween, but the backstory goes back even further. I have a former student who I taught at school, and I also taught him piano lessons. I met him in 2002 when I started my current job. This year he started acting school at NYU. Talk about a reality check- did you know that everyone grows up? It’s amazing, though, to watch a student grow into such an amazing person- he really is someone to be proud of.
Anyhoo, I procrastinated about giving him a graduation gift. Then I bought the gift… and it sat for a little too long in my purse. I’m amazed I didn’t use it instead, because I love me some Starbucks. But I wanted to make sure he got something relatively funny and special to make up for the fact that his gift was totally late and not really that creative. So I made over his Starbucks card.
Remember college? If you went to college, I bet you wish you had an endless Starbucks card for those mornings when you wake up and need. Coffee. Immediately. I harkened back to a day when I slept through an exam. Actually, come to think of it, I graduated from college in 1998 and I don’t think I had been in a Starbucks more than 2 or 3 times. I digress…
So first I hopped onto Photoshop and designed the new front for his card.

This is often how I feel in the morning, even though our budget doesn’t allow for Starbucks nearly as often as I’d like.
Then I slapped it onto the card- this was easy- I just tried to make sure the layer of Mod Podge was super thin because I didn’t want it to thicken the card up too much.

Then I traced the card holder to make it match. I had to trace the holder both directions- a good lesson in spatial awareness. 🙂 I also had to make sure I traced the little notches, and I cut them with a razor knife before MPing.

Then I Mod Podged that sucker up as well. Here’s the final product. Note that I poked fun at myself for taking so long. And you’ll probably see that the Mod Podge smeared the ink on my card- I did a thin coat on top and it did sort of “fog it up” but I sort of liked it, and also didn’t want to delay sending an already-late gift just because of some smeared ink.

I think I will do this again for Starbucks gifts- it was fun, easy, and once I got my rear in gear, a fun way to perk up an otherwise totally expected gift.
Read MoreMartha, I Made it!….. It’s just a pincushion
I know- it’s just a pincushion. But I made it. Ta da!

(Please pardon the poor lighting- I did this one at night.)
You can find the instructions (which are uber-simple) for this lovely heirloom tomato pincushion in your Martha Stewart’s Encyclopedia of Sewing and Fabric Crafts on page 278.
By the way, I’m in the process of making something else from this book that I am super excited about. It’s taking a long time to make- silly thing I have called a job keeps getting in the way. But it’s going to help me organize my sewing notions, get rid of my desk, and make way for a guest bed- wowzers! Can’t wait to show it to you!
Read More
Cancer sucks. Cancer can bite me. For reals.
(If you’d like, feel free to scroll to the bottom to see pictures- I got lots to say.) 🙂
I’ve been debating about whether or not to post about this project because it’s a bit personal for someone, and the someone isn’t me. But the thought of not sharing this doesn’t sit well with me either, so I’m going to post in hopes that my project might help other people dealing with the same thing, and that they will be able to copy my project in their own way.
A friend of mine was diagnosed with cancer in the last few weeks. It’s an aggressive form of cancer, one that requires immediate surgery and treatment. This friend is about my age- mid-30-something. A beautiful family, a beautiful life, a beautiful woman. And lo and behold, here comes the big C word to throw everything to a screeching halt. To protect her privacy and her family’s, I won’t mention how I know this woman or her name- it’s really her story. But I was still totally thrown by her diagnosis, perhaps because it really hit home that cancer doesn’t give a flying flip if you’re 4, 14, 40, or any age. And because of that, cancer can kiss my ass.
After my friend was diagnosed I found myself in a place that I bet a lot of people have been: “What do I do? What do I say? How can I possibly make this better when it sucks so completely?” I literally could not sleep the day I found out, even though I hadn’t spoken to this friend since earlier in the summer. For a while I tossed in bed that night, and then as this idea came to me, the hairs on my neck stood up, and chills went from my shoulders down to my wrists. I had a plan.
My apologies for not taking many pictures as I went, but as I made these canvases I also had family in town (my parents) and we had already planned a weekend trip amidst me trying to collect materials. I was lucky to finish it in time for it to be with her when she comes out of surgery (hopefully) and is recovering.
I wanted my friend to know how many people were supporting her. I sent out messages for all to write words- personal messages, inspirational quotes, whatever they felt comfortable with. I collected all of these messages and then typed them up in various fonts that seemed to fit. I had a lot of fun in Photoshop and learned a lot along the way.
I ended up needing 3 canvases. I wanted the center one to stand out, so I searched online for a graphic design of a heart. Then I painted my own simplified version using the colors I had chosen. I outlined a heart on the canvas and then painted around it. Then I filled in with white. These are acrylic paints that I used.

(many apologies for the quality- some of these were taken at night)
I painted the other two canvases a teal color. After they dried overnight I took the messages that I had already printed in various fonts and colors of paper and started to fit them all together like a puzzle. I am only showing shots of the three complete canvases and up close shots of the quotes that turned out well. I tried to keep the personal messages on the pastels and the single words and quotes on grays, with a little variation. Below are some shots of the final product(s):

I used foam squares to give them some dimension, lifting some pieces above others. This proved helpful with fitting things together- sometimes I need to tuck things underneath others, but I didn’t want anyone’s message to be blocked..

A friend wrote the verse on the right in this one (above). Ikaika & Lanakila are two Polynesian words for “strength” and “conquer.” I loved what this friend wrote and made it the center piece of the center canvas. I think if I were fighting this fight I would want to be reminded of those two words often.
 I love all of these fonts. I’m a font addict. I’ve been getting my fonts at dafont.com.
I made sure to use Mod Podge Paper so that the paper is preserved, and then I finished with Mod Podge Matte. The paper elevated on the foam squares did curl a bit- perhaps I should have mounted the raised pieces on wood or something, but I actually ended up liking the way it turned out.
My hope is that if anyone you know is diagnosed with anything horrible- cancer or otherwise- that you might be inspired to make something for them. I know that my friend will appreciate this, and I hope that in a couple of years, when she has kicked cancer’s ass that she can still look at these and remember that she wasn’t fighting alone- she had lots and lots of people fighting with her.
Read MoreAbout Natalie
 Life is crazy. Craft it well. Thanks for stopping by Crafting Crazy! I'm stumbling into a new sort of life after leaving a 12-year teaching career. More of a practical crafter, I'm trying to temper the perfection a bit. If I mess up, I’ll be sure to share- then we can laugh together. Here you'll find anything I like that makes my life better or fun. Crafts, of course, but also posts about food, home decor, exercise... whatever I'm dabbling in at the moment. I'm so glad you're here- thanks for stopping by!
 Content Brewing!
Ready to Rock?

I’m a Clever Girl!
SITS-stahs!

Chronically Distracted


This work is licensed under a Creative Commons Attribution-NonCommercial-ShareAlike 3.0 United States License.
Keep Up With the Crazy